
Did you know that your hips can become unleveled? I’m not saying they are ‘out of place,’ because if they were you would be making a trip to the hospital as they would be dislocated at that point. What I’m talking about is how your hips can be tugged and pulled on by the muscles that attach to them causing the bones in your hips to rotate front to back. Usually, the culprit can be one quadriceps muscle or hip flexor that is really tight on one side and a hamstring muscle can be really tight on the other. Or the same situation but above the pelvis where your lower back muscles may be playing tug of war with your abdomen and adductor muscles. There is also a condition called, ‘lower cross syndrome’ that can also play a part.

Lower cross syndrome:
As referenced from Physiopedia, “The lower crossed syndrome (LCS) is the result of muscle strength imbalances in the lower segment. These imbalances can occur when muscles are constantly shortened or lengthened in relation to each other.“1 This in turn can potentially cause your hips to have a misalignment and rotate to the front and to the back. As shown in the photo to the right, usually this is caused by weak abdominal muscles and gluteal muscles, along with tight hip flexors and back extensors.
This can all be corrected with the right muscle strengthening, mobility and stretching for long-term benefits, however, there is a way to correct your hip alignment with a bit of PNF stretching. If you have not read any of my other posts, “Proprioceptive Neuromuscular Facilitation (PNF) is an advanced form of flexibility training, which involves both the stretching and contracting of the muscle group being targeted. PNF stretching is one of the most effective forms of stretching for improving flexibility and increasing range of motion.“2
How to do the exercise:

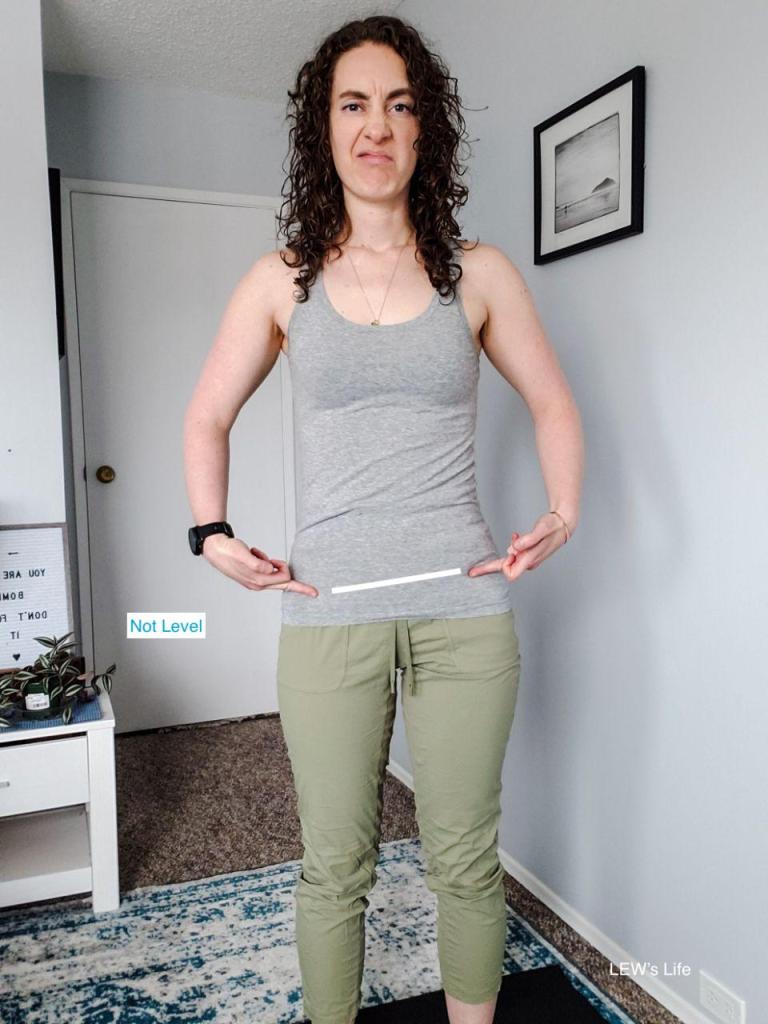
Hips level: Place your hands on your hips – where the top of your pelvic bones start, above it is soft tissue. Then rest your fingers down on a 45º angle to find the ASIS (boney ridge on the front of your hips that feels like it has a dip and shelf – shown in red to the right). Look at yourself in the mirror and see your two finger levels on the ASIS. If they are even and at the same level across your hips they are good. If there is one higher and one lower, your hips are rotated and need to be corrected before physical activity or a daily routine.


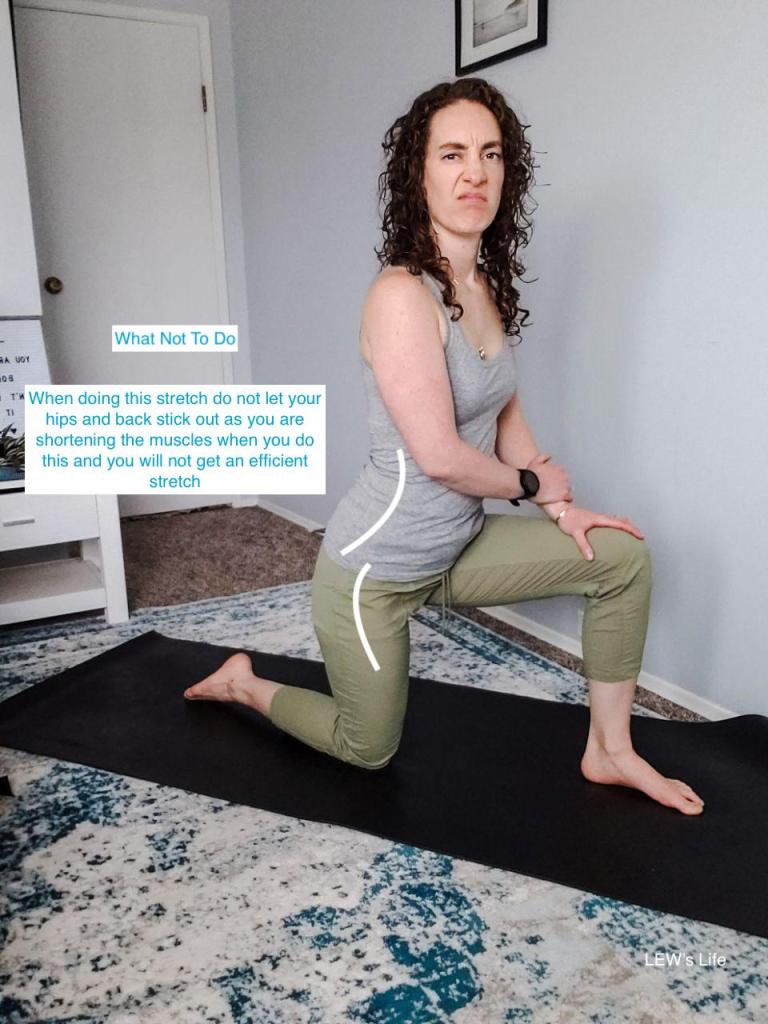
To correct the quad and hip flexor groups: The side that has the ASIS down (the finger that was lower than the other), you will be stretching that quad and hip flexor group. In a runner’s lunge, keep your chest up and pelvis tilted forward then lunge forward until you feel a stretch. Hold the stretch for 8-10 seconds then lightly contract your bent knee into the ground as if you are moving the limb into hip flexion. Hold the contraction for 5 seconds, stop the contraction and move further into the stretch and hold the stretch for another 10 seconds. Repeat this sequence 2-4 times. Stand back up and check your hip levels in the mirror, if they are still not level you must work on the opposite hamstring.


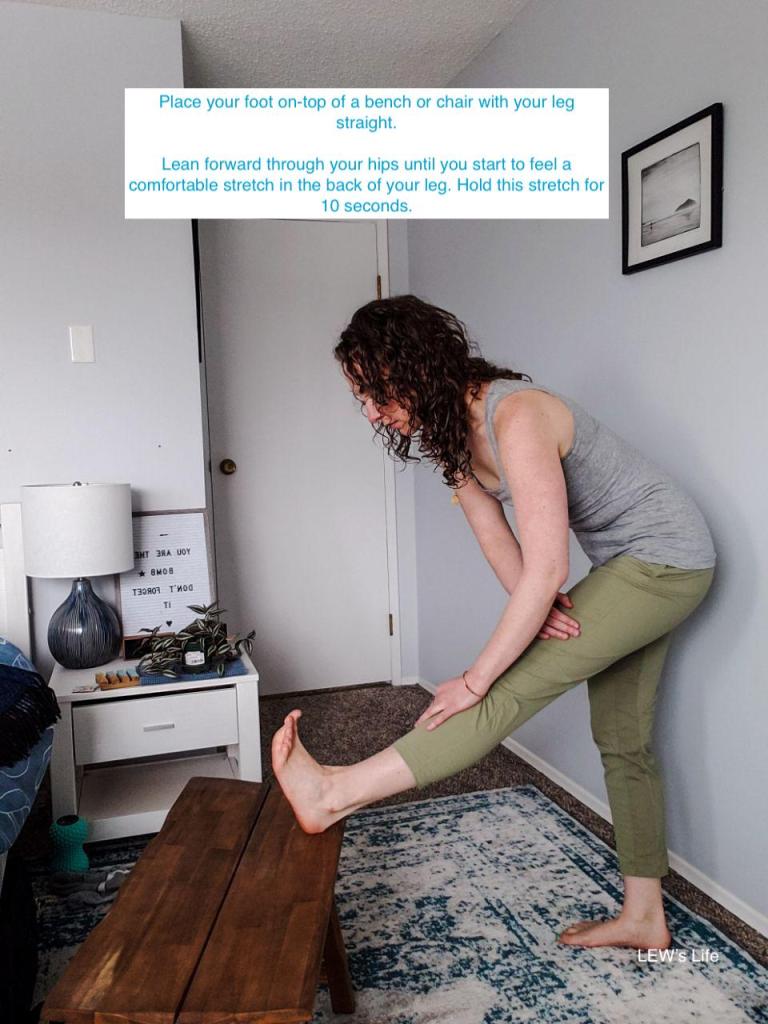
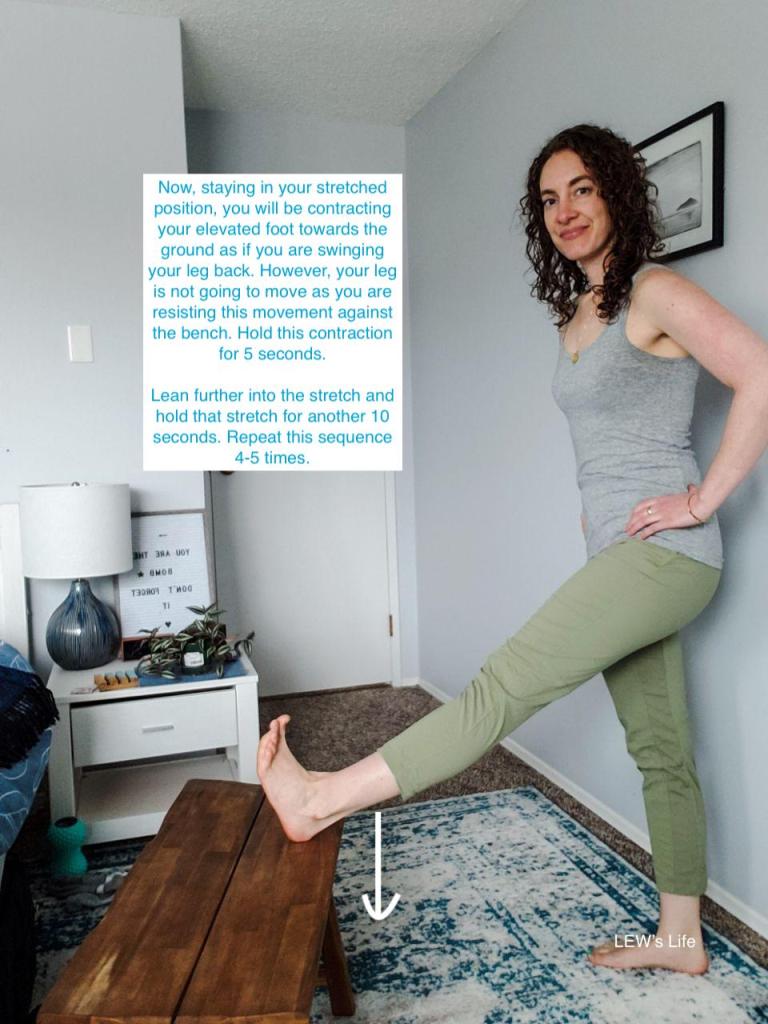
To correct the hamstring: Place your leg on a bench or chair with your leg straight. Bend forward through your hips until you feel a stretch in your hamstring. Hold the stretch for 8-10 seconds then contract your heel into the bench or ground to contract the hamstrings. Hold the contraction for 5 seconds then stop the contraction and move forward into the stretch and hold the stretch for 10 more seconds. Repeat this sequence 2-4 times. Stand back up and check your hip levels in the mirror.
Another way of stretching the hamstrings I demonstrated in a previous blog post where you use a yoga strap on the ground following the same PNF pattern as above. That blog post can be found here.
The quick and dirty way of doing this:
An easier, quicker but not as precise way of correcting the hips goes as follows.
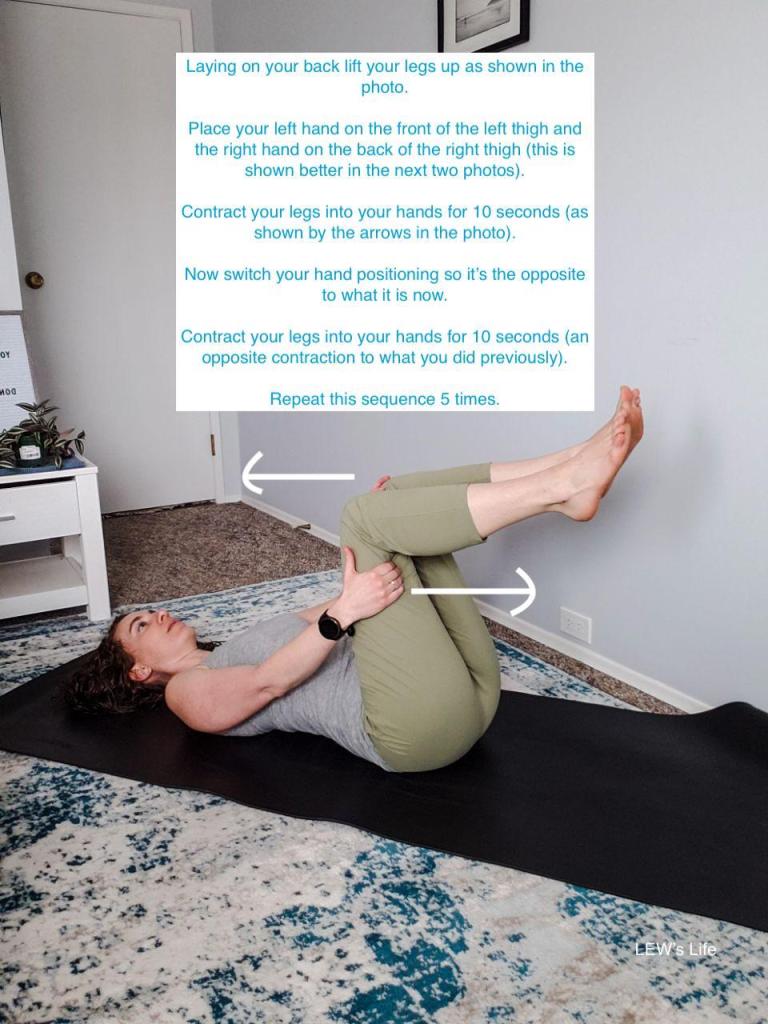
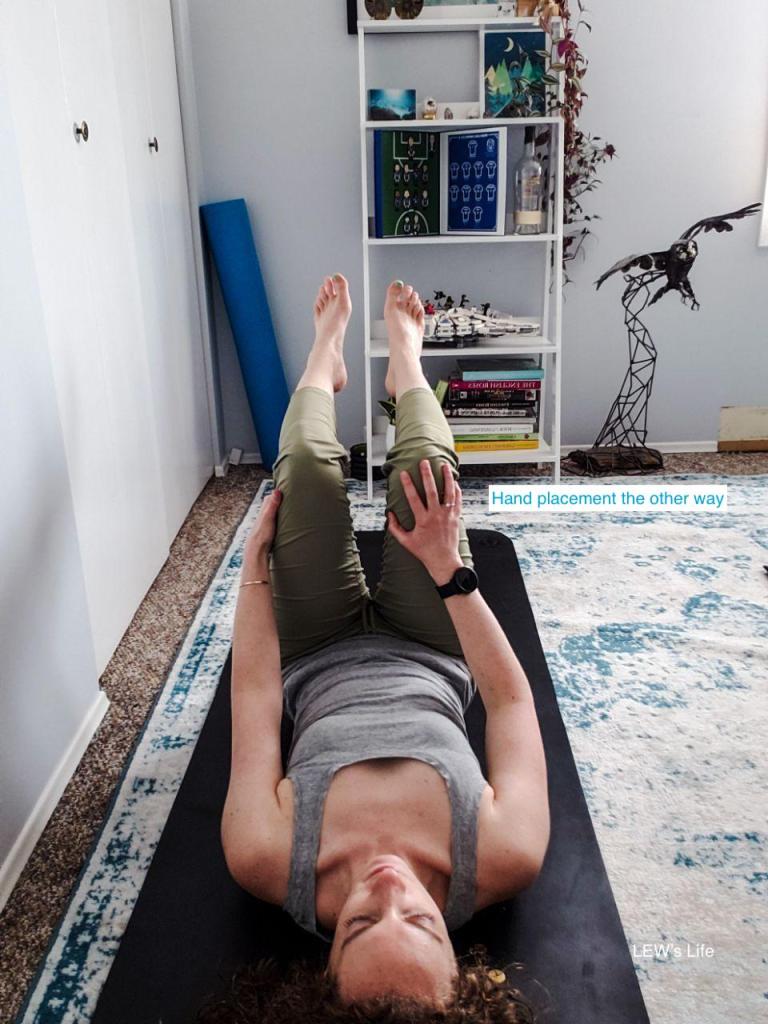
Hips Level on back: Laying on your back and legs up in the air, place your right hand on the front of the right knee and the left hand on the back of the left knee (into the hamstrings). Contract your right knee into your right hand and contract the left knee into your left hand. Your legs will be contracting into opposite directions. Hold the contraction for 10 seconds then switch hand positioning and repeat moving in the opposite direction as before and contract for another 10 seconds. Repeat 2-4 times per side.

Be sure to watch the video below from my Instagram account showing you how to level your hips.
References:
- https://www.physio-pedia.com/File:Crossed_syndrome.jpg
- https://stretchcoach.com/articles/pnf-stretching/
Please Keep This Disclaimer in Mind:
Articles are for educational purposes only and are not intended to diagnose, treat, cure or prevent diseases. We cannot and do not provide medical advice or specific advice on products related to treatments of a disease or illness.
You must not rely on the information on our website as an alternative to medical advice from your doctor or other professional healthcare providers.
You should never delay seeking medical advice, disregard medical advice or discontinue medical treatment because of information on our website.
It is your responsibility to consult with your professional health care providers before starting any diet changes, exercise or supplementation program, and before taking; varying the dosage and / or ceasing to take any medication.
We do not collect any personal information or store cookies. You can turn off cookies on your web browsers.
